Soul Food Studio

coffee table

Upcycled Pallet Coffee Table

Crafts, AllAmanda Russell

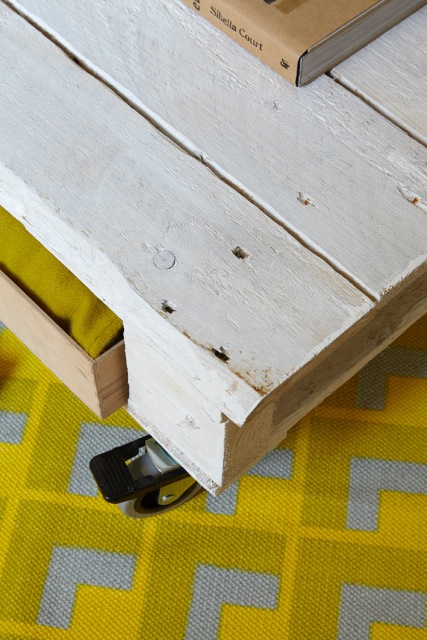
I'm in love with this pallet coffee table. Not the the best at being tidy and I do like space to style up, this helps with both! Loads of storage space under the top to slide in shallow boxes and lots more on top for books and plants. 

You will need:

  • -Two wood pallets

  • Surform

  • Emulsion paint

  • Scumble glaze

  • Bucket

  • Screws

  • Drill

  • Four castor wheels

  • Basket trays

  1. Carefully remove the long slats from one of your pallets, then screw them onto the base of the other to make support for the drawers to sit on..

  2. Using a surform (a tool similar to a cheese grater) remove any loose bits of wood from the pallet surface, edges and underside.

  3. In a bucket, mix 100ml of scumble glaze with 400ml of emulsion paint, add a little water to thin the glaze. Brush onto the wood. I chose white to give a white-washed look.

  4. Turn your coffee table upside-down and screw a wheel to each corner. Finally slide storage boxes into the gaps under the top.

If you like this post make sure you check out my post on Printing your own Labels

Must Have Retro Tiled Coffee Table

Crafts, AllAmanda Russell

Customise your own retro tiled coffee table, take a cheap as chips high street coffee table and give it enviable style and originality with this easy project. I used ceramic pens to add designs to budget white glazed tiles, easily sourced from any of the diy sheds.

You will need:

  • Coffee table

  • Tiles

  • Ceramic pen

  • Tile adhesive

  • Grout

  • Edging strip

  • Black paint

  • Paint brush

  • Beading for edging strip

  • Panel pins

  • Hammer

  • Saw

  1. Choose two designs for the pattern on the tiles and then draw on with the ceramic pen. Leave tiles to dry.

  2. Paint the table with black paint.

  3. Arrange the tiles on the tabletop, keeping the design random, combine patterned and plain tiles. When you’re happy with the design take a photo to use as your guide as you stick the tiles in place with tile adhesive. I stuck these tiles snuggly against each other. Leave to dry.

  4. To neaten the table edge cut a retaining strip from beading then secure in place with panel pins.

  5. Grout the table, leave to dry. Paint the retaining strip to match the table.

If you like this make check out my Upholstered Footstool post